Creating Electronic Case Report Forms (eCRFs)
This guide walks you through designing and publishing a new Electronic Case Report Form (eCRF) in Frappe and viewing it in the clinical study application.
Target Audience
| Role | Access Level |
|---|---|
| Administrator | Full access to Frappe and CRF design |
Prerequisites
- Access to your Frappe instance
- Administrator credentials
- Access to the clinical study application
Step 1: Login to Frappe
- Navigate to
{your-frappe-host}/login - Enter your credentials

Step 2: Navigate to DocType List
Go to the DocType list in the Healthcare module:
{your-frappe-host}/app/doctype?module=Healthcare

Step 3: Create a New CRF Form
- Click Add DocType
- Name your form with the prefix
CRF_FORM_- Example:
CRF_FORM_MICRONUTRIENTS_ANTIOXIDANTS
- Example:

Always prefix your CRF forms with CRF_FORM_ to ensure they are recognized by the application.
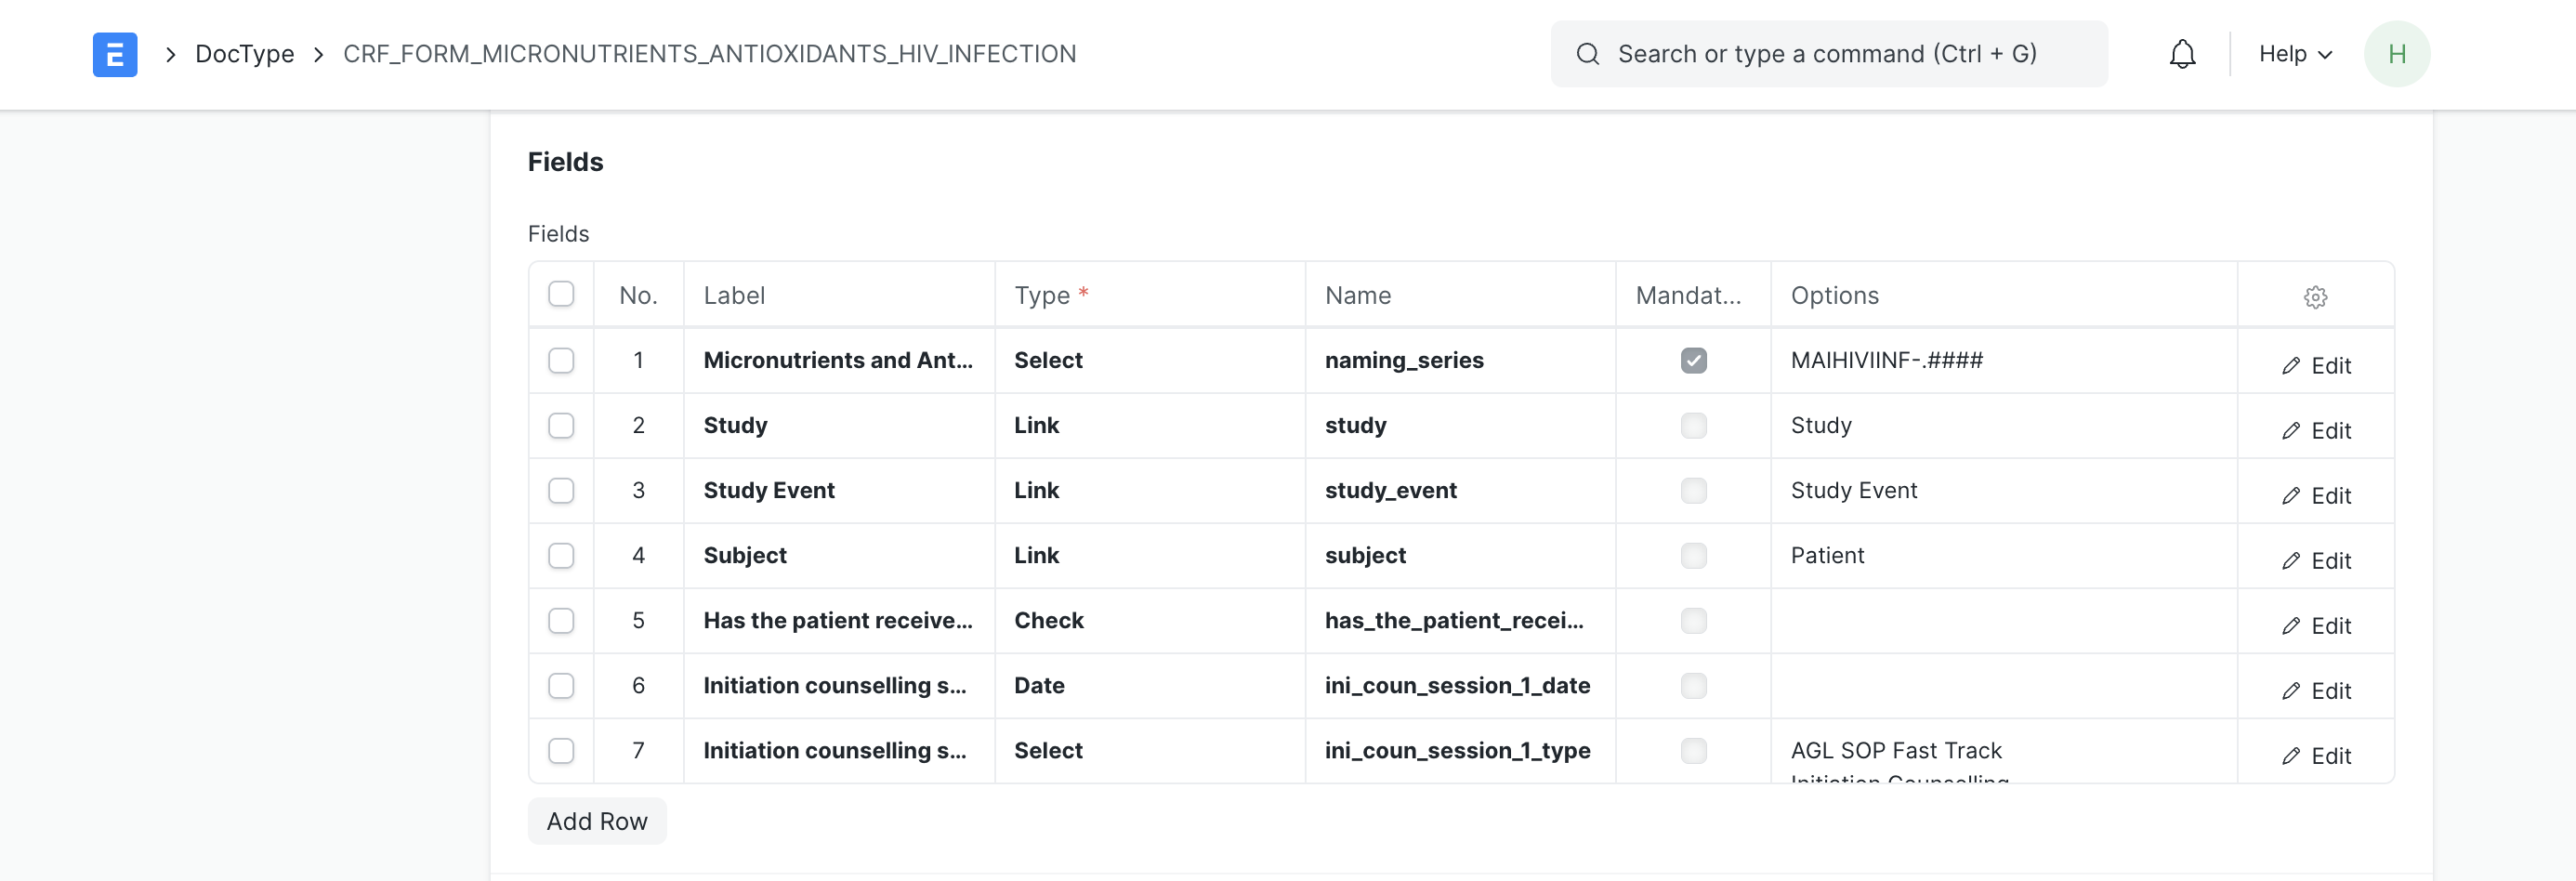
Step 4: Design Required Fields
4.1 Natural Key Field (Required)
This must be the first field in your form:
| Property | Value |
|---|---|
| Label | Descriptive name (e.g., "Micronutrients Study Id") |
| Type | Select |
| Name | naming_series |
| Naming Series | Short identifier (e.g., MAIHIV-.####) |

The naming series should be a short form of your form name followed by .#### for auto-numbering.
4.2 Relationship Fields (Required)
Add these three required fields:
| Field | Link To |
|---|---|
| Study | Study DocType |
| Study Event | Study Event DocType |
| Subject | Subject DocType |

Position the Study and Subject fields next to each other as they are both read-only display fields.
Step 5: Add Form-Specific Fields
Add the data collection fields for your study.
Checkbox Field Example
| Property | Value |
|---|---|
| Label | Has the patient received initiation counselling? |
| Type | Check |
| Name | has_patient_received_initiation_counselling |

Use slugified form of the label for the field name.
Date Field Example
| Property | Value |
|---|---|
| Label | Initiation counselling session 1 Date |
| Type | Date |
| Name | ini_coun_session_1_date |

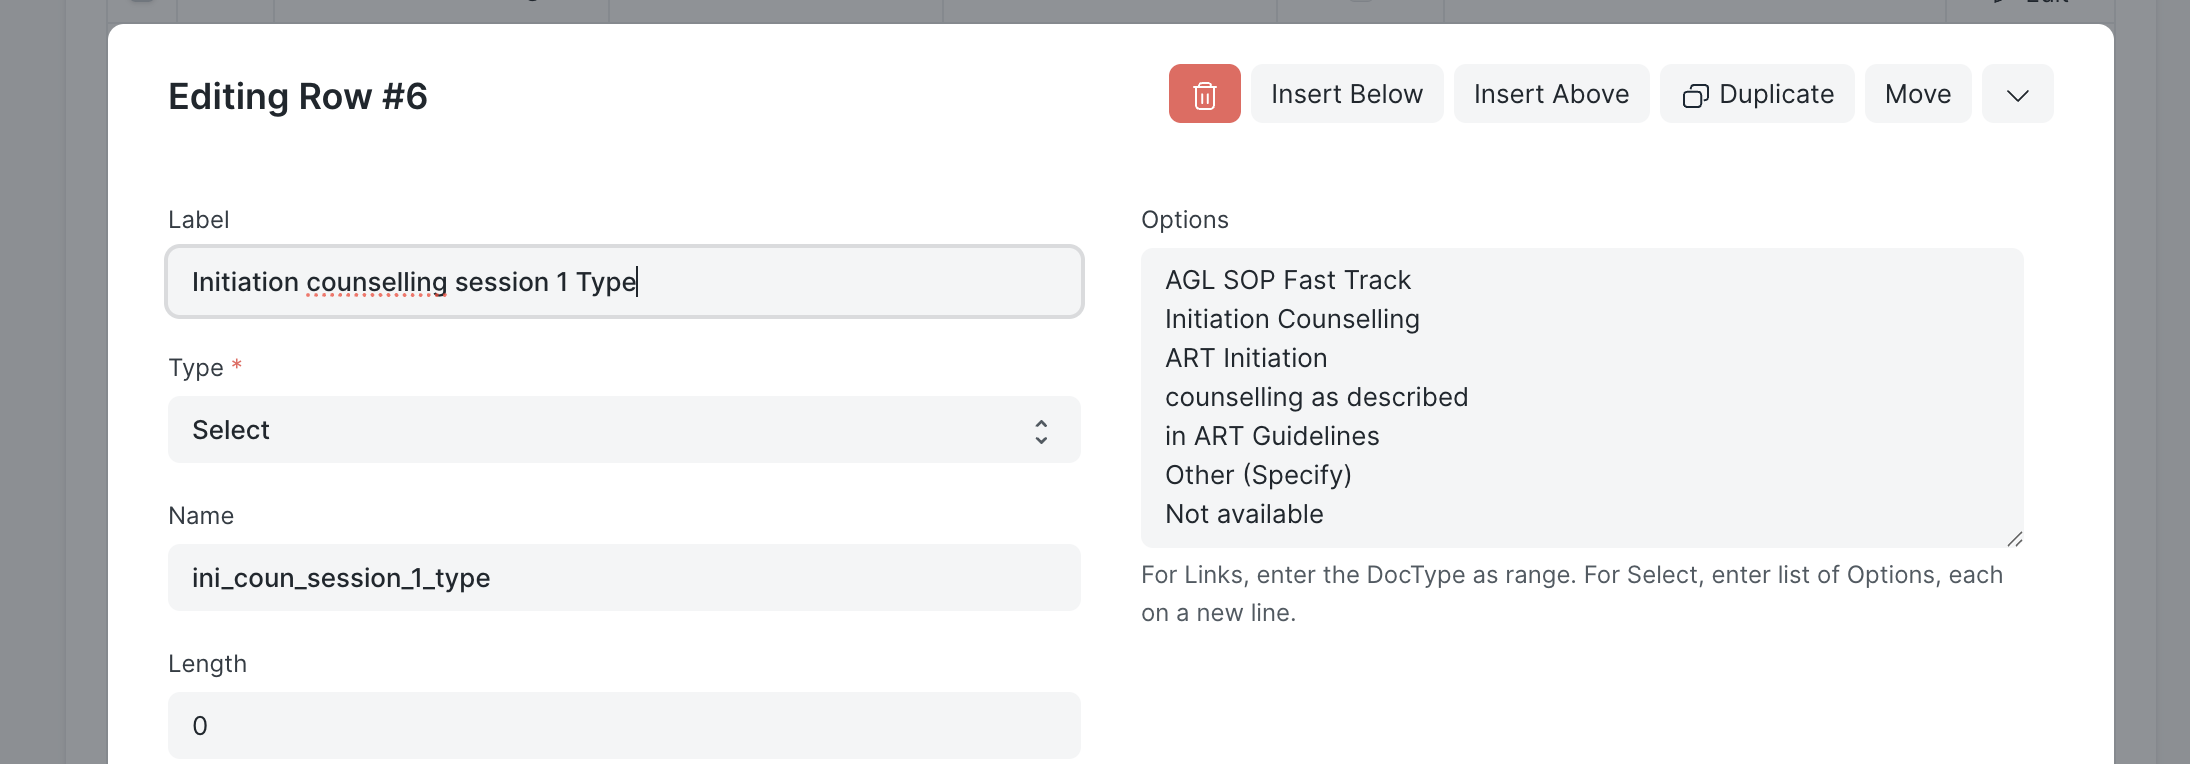
Select Field Example
| Property | Value |
|---|---|
| Label | Initiation counselling session 1 Type |
| Type | Select |
| Name | ini_coun_session_1_type |
| Options | One option per line |

Step 6: Save Your Form
Click Save to publish the form.
Step 7: Add CRF to a Study
- Navigate to Studies in the clinical application
- Select the target study
- Go to the CRFs tab
- Click Add CRFs
- Select your newly created form
- Click Add

Step 8: View CRF in Action
CRF forms are accessed through the participant/subject interface.
- Navigate to Subjects tab in your study
- Select a subject
- Your CRF form appears in the left navigation
- Click on the form name
- Click Add First CRF Entry to begin data capture

Quick Reference
| Requirement | Details |
|---|---|
| Form prefix | CRF_FORM_ |
| Required fields | naming_series, Study, Study Event, Subject |
| Access point | Subject/Participant view |
Troubleshooting
| Issue | Solution |
|---|---|
| Form not in CRF list | Verify form name starts with CRF_FORM_ |
| Form not appearing | Ensure all required fields are present |
| Data not saving | Refresh the application and retry |